
Appearance
1. Draw a tiled platform
Start an empty scene with the bundled tileset and draw a 3×3 stone platform on a locked ground plane.
Before you start: Open Plate using the getting-started instructions. You need a desktop browser with WebGL2.
Time: about 5–10 minutes. Screenshots show the dark desktop interface; click them for full size.
1. Start an empty scene with tiles
Choose File → New (demo tileset). This clears the scene while keeping the bundled atlas available. New (empty) has no atlas and is not used in this lesson. A translucent square may remain visible as the brush preview; the status bar's tiles 0 confirms no tiles have been committed.
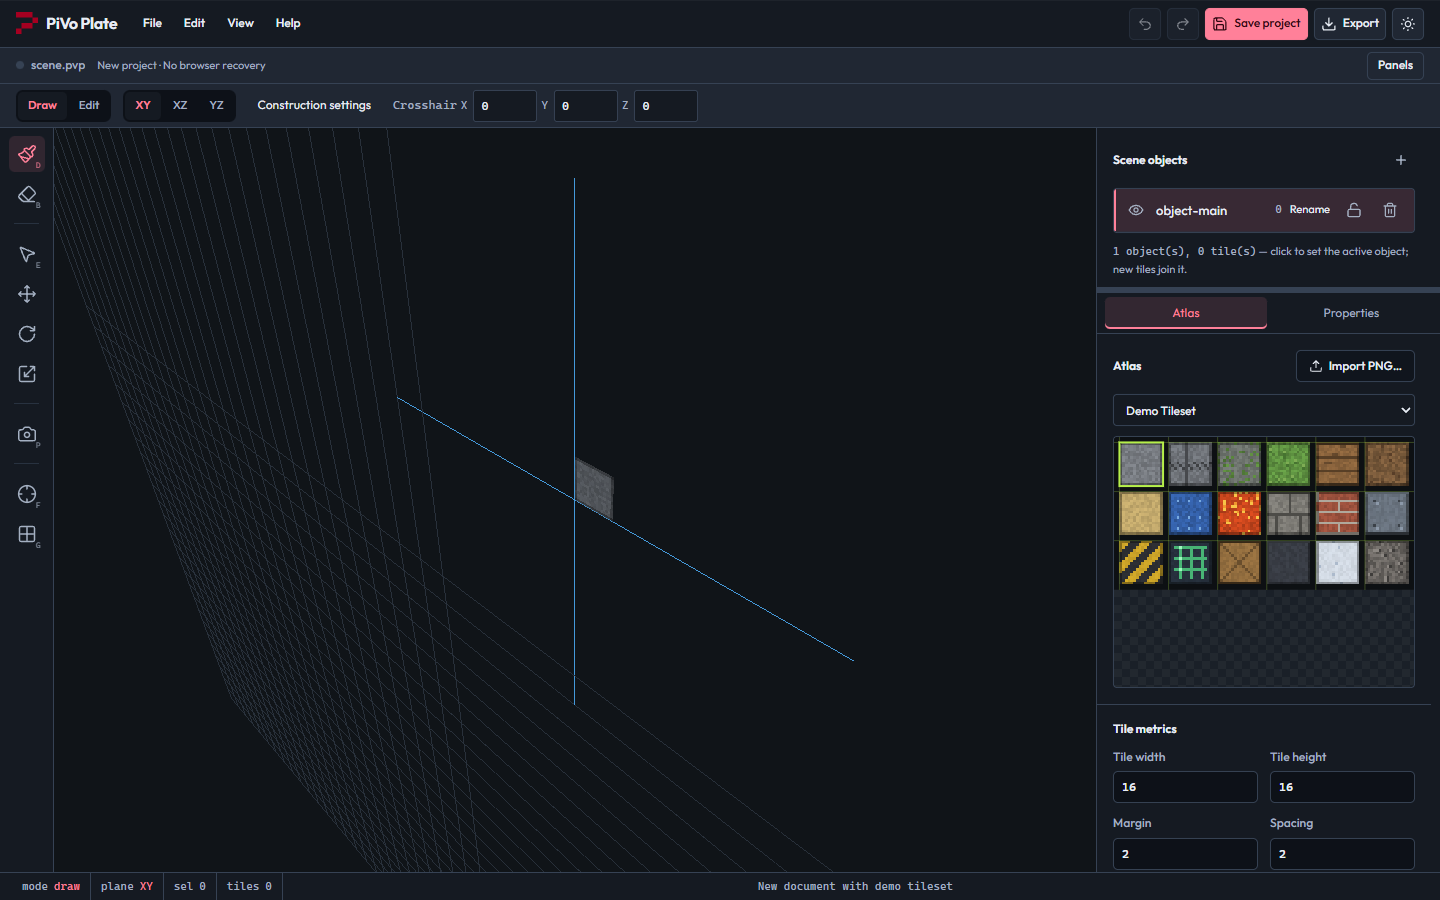
The new scene has no tiles but retains Demo Tileset.
2. Choose the stone tile
Click the Atlas tab and select the top-left stone tile in Demo Tileset. Select one cell rather than dragging across several cells.
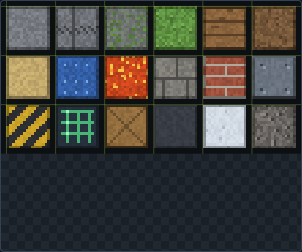
The top-left stone floor cell is selected as the brush.
3. Choose the ground plane
Select XZ in the context toolbar, or focus the viewport and press Z. This creates horizontal tiles facing upward.
4. Lock the construction plane
Open Construction settings and enable Lock plane (disable auto camera plane). You can also focus the viewport and press L. Confirm the status bar shows XZ with a lock indicator. Keep Grid snap = 1 and Tile size = 1.
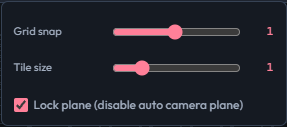
Construction settings show Grid snap 1, Tile size 1, and plane locking enabled.
5. Place the first row
Use Draw mode. Click the centers of the three adjacent ground cells with X coordinates 0–1, 1–2, and 2–3, at Z 0–1. The crosshair readout helps identify the hovered cell origin.
6. Complete the square
Place the next two rows at Z 1–2 and 2–3, with the same three X cells. The platform should contain nine tiles. Avoid stamping the same cell again.
7. Frame the platform
Choose View → Frame scene, or focus the viewport and press Home. Middle-drag orbits, right-drag pans, and wheel zooms.
8. Save the scene
Choose File → Save project or use the header's Save project button. Keep the .pvp download as stone-platform.pvp; the browser may initially suggest scene.pvp.
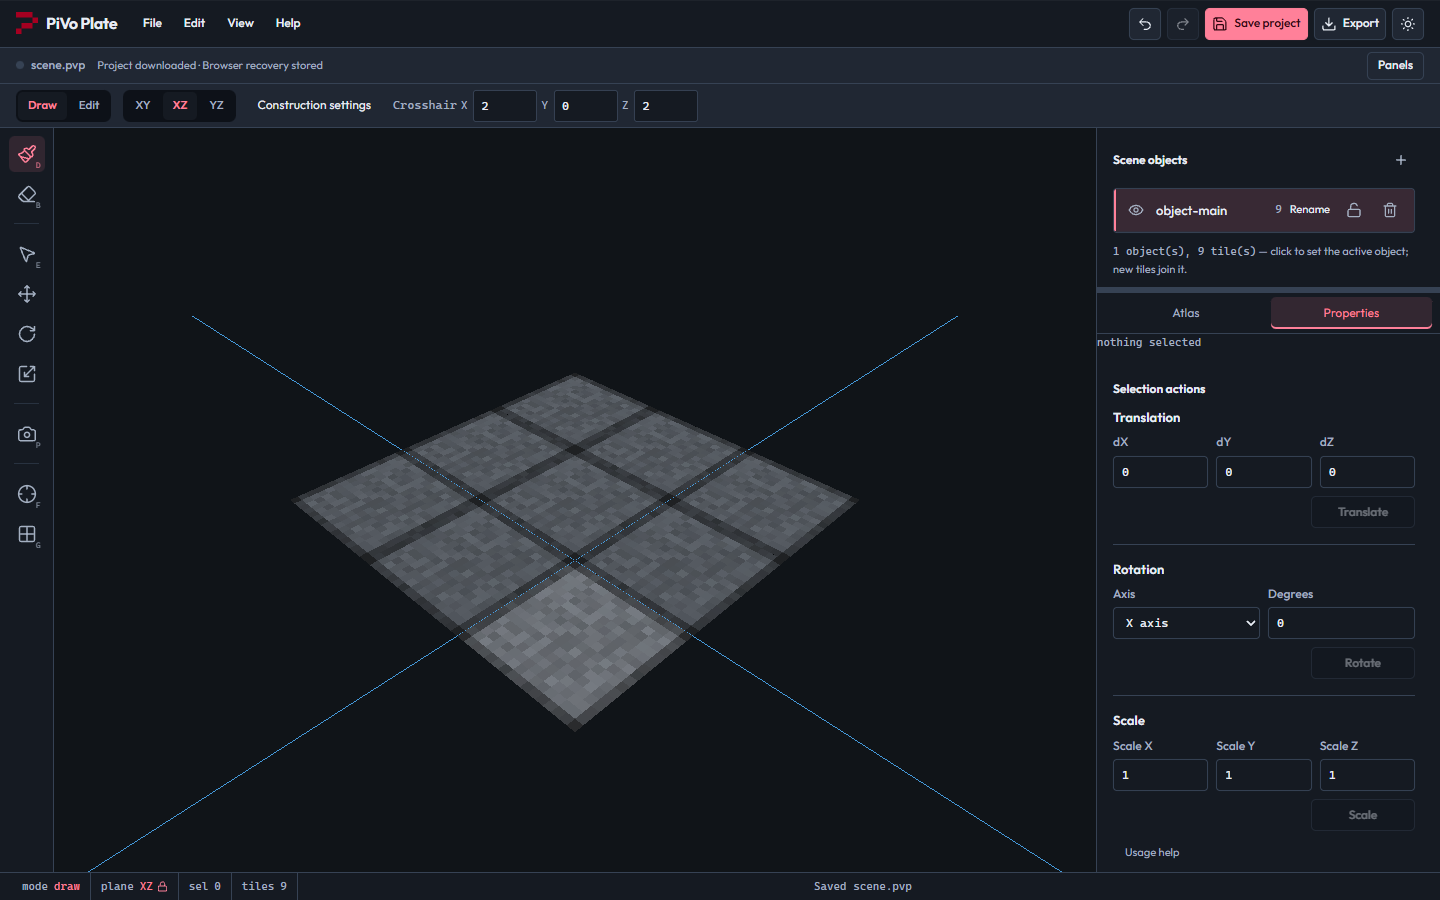
The completed platform contains a 3×3 grid of nine stone tiles.
Finished result
Nine 1×1 stone tiles forming a horizontal 3×3 platform.
Download the finished project.
If something looks different
Keep the plane locked before drawing; automatic plane selection can otherwise change as you orbit. New (empty) requires a PNG import first. If you accidentally add a duplicate tile, use Undo immediately.